
Web scraping: a tutorial
In this post, I will go over what I learned while exploring some features of Beautiful Soup and data extraction using web-based API.
Motivation
Over the past few months, the contents of this blog have mostly been about machine learning, which was chiefly because of two reasons. The first was my desire to learn the mathematics at work under the hood of machine learning models. In fact, this desire is still the main driving force behind my dream of building my own ML models as a data scientist. Although I am currently learning how to apply existing models to available data on the web, I am nonetheless still excited by studying ML with emphasis on its mathematical foundations.
That being said, however, in the past three or four days, I have tried to learn something that I had been interested in for some time–web scraping. When I first encountered the idea of web scraping, it struck me as fascinating how one didn’t have to visit websites to see what inforamation was available on those sites. Instead, with some simple HTML analysis using Beautiful Soup and basic knowledge of web-based APIs, one could essentially review the information that one needed from several websites. I figured that with web scraping, I could save a lot of time when looking for any best-buy products that I need. As of right now, I am planning to build an independent project out of this idea, potentially using Flask in the process, to host any web-scraping functionality.
In this post, I will explain what I learned while exploring Beautiful Soup, a basic web-scraping tool, as well as web API. I attempted to make a tutorial out of this post, which I hope is useful for those who are learning about the concerned materials. The code blocks in this post reference Python for Data Analysis by Choi Eun-seok.
Web Scraping: Background Knowledge
Web scraping is essentially the activity of scraping text, pictures, or other forms of information from the web. Python, it turns out, supports a lot of web scraping tools and packages, which come in handy when gathering large amounts of data from websites. In fact, with web scraping tools, one does not have to individually access the websites, select the necessary materials, and copy/paste.
To discuss web scraping, we need to be able to open websites efficiently, and understand the basic process in which the information on those websites is displayed to us. To do that, we will first look at the python-based webbrowser module.
Webbrowser module
The webbrowser module streamlines the process of opening webpages, which can get unnecessarily complex when one is trying to open, say, more than twenty or so webpages at once. Even if one manages to save those sites on a bookmark, it would obviously be tedious work to go over all of them and open them individually.
import webbrowser

url = 'www.google.com'
webbrowser.open(url) # opens Google
True
The above code block opens up Google on a new tab. With the following code block, the user can perform a Google search on the Python IDE.
import webbrowser

inputValue = input("Enter search word: ") # user input for Google search

google_search_url = "https://www.google.com/search?q="
url = google_search_url + inputValue # creates a url that allows users to search the input word on Google

webbrowser.open(url) # opens Google search result of the input word
Enter search word: seoul

True
Request & Response
In this section, I will discuss some basic background knowledge behind web scraping, focusing on HTML in particular. When we access an internet website or a search engine, the device attempting the access is called a “client,” and the system running the website is called a “server.” When the device attempts to gain access to a website, it sends the server an HTTP request. HTTP, which stands for “Hypertext Transfer Protocol,” is essentially a set of rules that governs information exchange over the web. The recipient of the HTTP request, which is the web server, provides an HTTP response, which consists of a file written in HTML. HTML stands for “Hypertext Markup Language,” and is one of the languages that provides structural composition to a website. The web browser, having received this HTML file, interprets and displays it in a user-friendly manner.
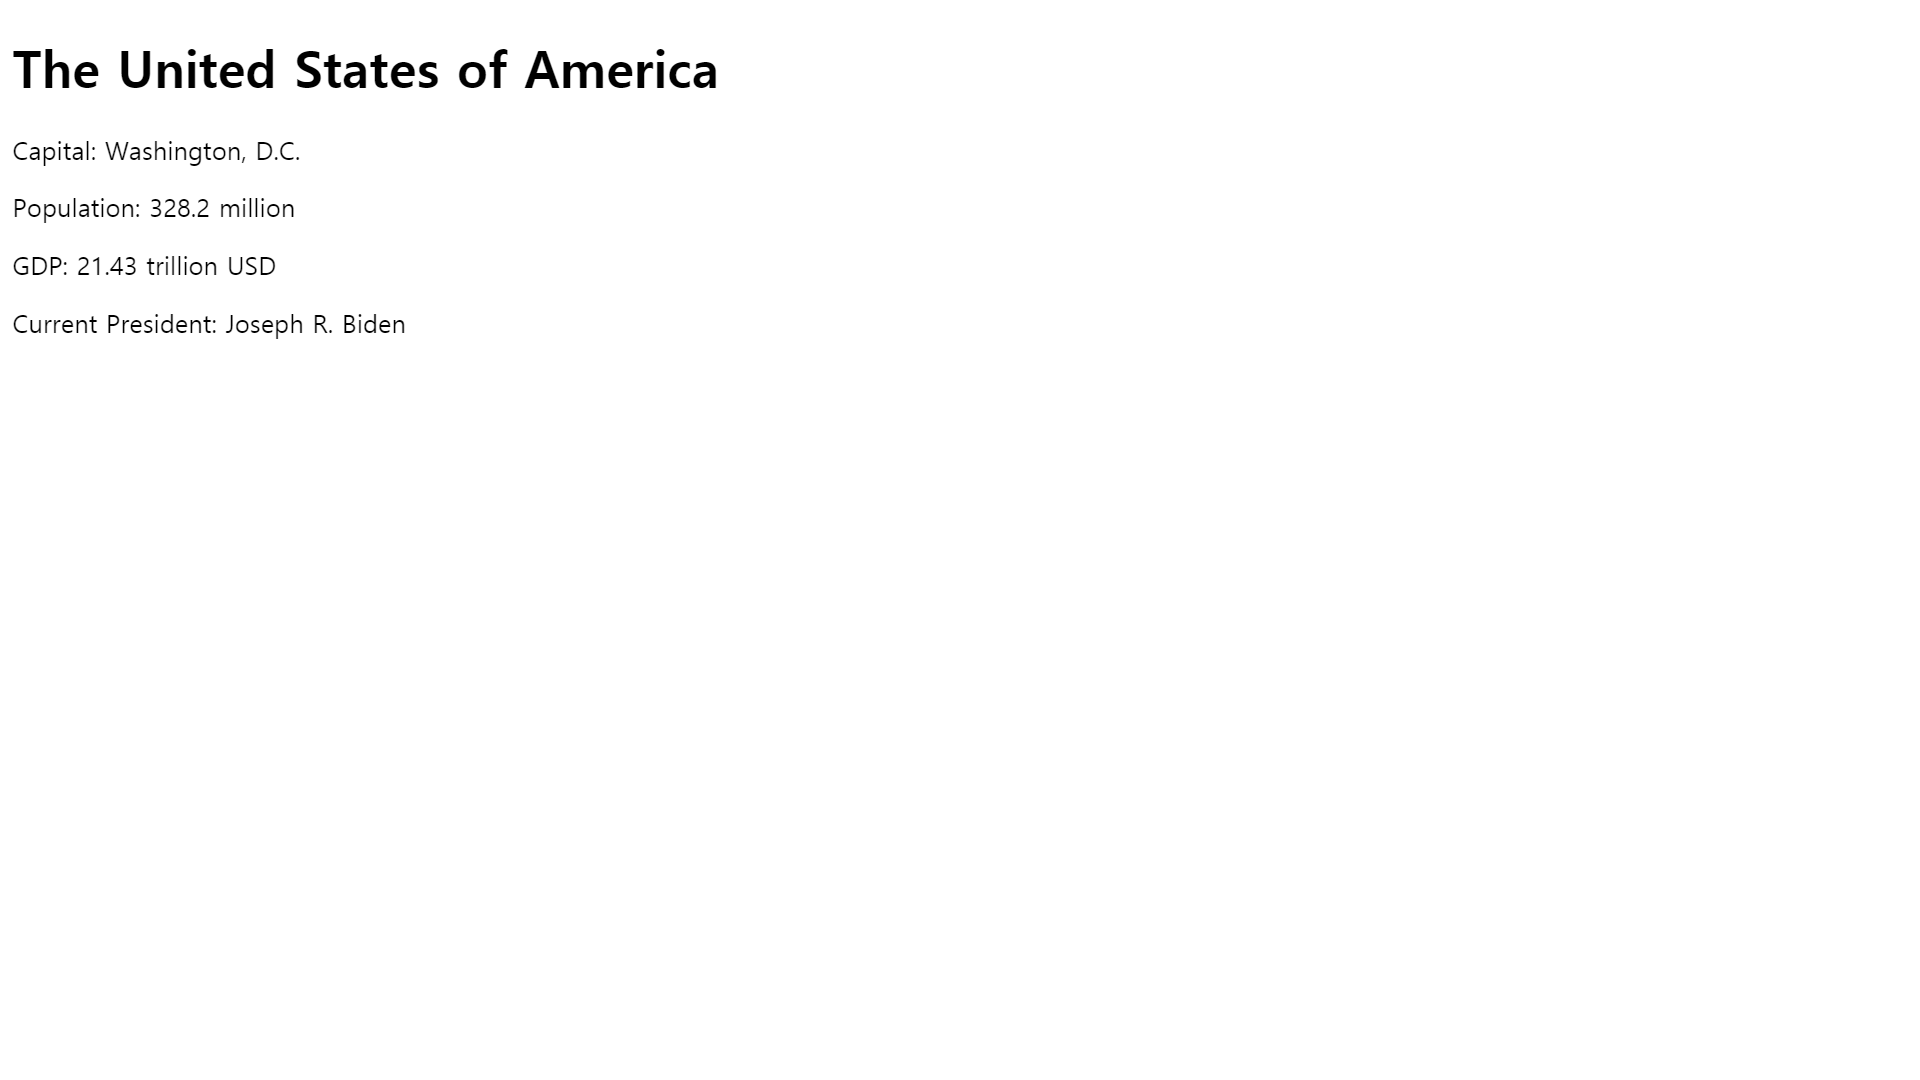
Even though I won’t go into too much detail about HTML, it is useful to know that it is a structured language that consists of a head and a body. To look at a basic example of an HTML file, the following short HTML file produces the following image:
%%writefile C:\myPyCode\HTML_example.html
<!doctype html> <!-- DCD (document type definition) declaration: HTML document -->
<html> <!-- The part enclosed by <> are HTML tags, which determine the structure of the HTML file. -->
    <head>
        <meta charset="utf-8">
        <title>Title: Sample HTML Code</title>
    </head>
    <body>
        <h1>The United States of America</h1>
        <p id="capital">Capital: Washington, D.C.</p>
        <p id="population">Population: 328.2 million</p>
        <p id="gdp">GDP: 21.43 trillion USD</p>
        <p id="president">Current President: Joseph R. Biden</p>
    </body>
<html>
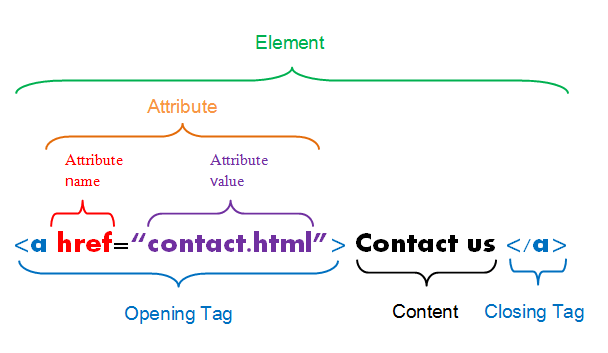
The following image succinctly describes the composition of a line of HTML code. The image was taken from Duke University’s statistics department.
BeautifulSoup & Parsing
In this section, I will briefly go over some basic functionalities of Beautiful Soup, a Python library that is commonly used to parse HTML files. The file below will be used for the demonstration.
%%writefile C:/myPyCode/HTML_sample_site.html

<!doctype html>
<html>
    <head>
        <meta charset="utf-8">
        <title>Collection of Sites</title>
    </head>
    <body>
        <h1>Collection of Most Visited Sites</h1>
        <p id="description"><b>Most Visited Sites</b></p>
        <p id ="contents">The following is a list of the websites that I visit most frequently. <br1/> </p>

        <a href="https://www.nytimes.com/" class="news1" id="NYT">1. The New York Times</a> <br>
        <a href="https://www.msnbc.com/" class="news1" id="MSNBC">2. MSNBC</a> <br>
        <a href="https://www.washingtonpost.com/" class="news2" id="WP">3. The Washington Post</a> <br>
        <a href="https://www.latimes.com/" class="news2" id="LAT">4. The Los Angeles Times</a> <br>

        <p id="description"><br1/><br1/> More specifically, I only listed news media websites, but I could also have listed others as well,
                            including, <br/1> <br/>1. Entertainment websites <br/>2. Search engines <br/>3. Sports websites

    </body>
</html>


In the first line, `<!doctype html>` tells us that the above code block is written in HTML. `<!doctype html>` is called a DTD, or a "document type declaration." Below the line, there are several code segments enclosed by <>. These code segments are called "tags," and they are used to determine the overall structure of the HTML document. The starting and closing tags enclose "tag elements", with the notations <> and </> being used to mark starting and closing tags, respectively. The `<meta charset="utf-8">` denotes the HTML file encoding: `utf-8`.

Next, we import the Beautiful Soup library, which should have been automatically installed with Anaconda. Beautiful Soup allows the user to parse the HTML code of a website, and for a quick demonstration, I will use the HTML code block above.


```python
from bs4 import BeautifulSoup

file = open('C:/myPyCode/HTML_sample_site.html', encoding='utf-8')
htmlFile = file.read()
file.close()

soup = BeautifulSoup(htmlFile, 'lxml') # 'lxml' is the parser used to parse the HTML file.

soup.select('a') # '.select() brings all the elements with tag 'a'
[<a class="news1" href="https://www.nytimes.com/" id="NYT">1. The New York Times</a>,
 <a class="news1" href="https://www.msnbc.com/" id="MSNBC">2. MSNBC</a>,
 <a class="news2" href="https://www.washingtonpost.com/" id="WP">3. The Washington Post</a>,
 <a class="news2" href="https://www.latimes.com/" id="LAT">4. The Los Angeles Times</a>]
soup.select('a.news1') # only prints elements with tag: 'a', class: 'news1'
[<a class="news1" href="https://www.nytimes.com/" id="NYT">1. The New York Times</a>,
 <a class="news1" href="https://www.msnbc.com/" id="MSNBC">2. MSNBC</a>]
soup.find('p', {'id':"description"})
<p id="description"><b>Most Visited Sites</b></p>
Scraping from Alexa & Billboard Top 100
Now that we practiced web scraping with the custom-built webpage, in this section, I will briefly go over how to scrape ranking data from two websites: Alexa U.S and Billboard 100. Alexa, an Amazon subsidiary based in San Francisco, offers web traffic analysis to clients, and is perhaps most famous for its Alexa ranking site. In this exercise, we will look at how to extract the ranking data of top websites in the U.S, based on traffic data. We will also look at how to extract the top ten songs of the Billboard Top 100 list, effective as of July, 2021.
import requests
from bs4 import BeautifulSoup

url = "https://www.alexa.com/topsites/countries/US"

html_web_rank = requests.get(url).text
soup_web_rank = BeautifulSoup(html_web_rank, 'lxml')

web_ranking = soup_web_rank.select('p a')
web_ranking[0:10] # displays the top 10 websites in terms of traffic in the U.S, on July 8th, 2021.
[<a href="https://support.alexa.com/hc/en-us/articles/200444340" target="_blank">this explanation</a>,
 <a href="/siteinfo/google.com">Google.com</a>,
 <a href="/siteinfo/youtube.com">Youtube.com</a>,
 <a href="/siteinfo/amazon.com">Amazon.com</a>,
 <a href="/siteinfo/yahoo.com">Yahoo.com</a>,
 <a href="/siteinfo/facebook.com">Facebook.com</a>,
 <a href="/siteinfo/zoom.us">Zoom.us</a>,
 <a href="/siteinfo/reddit.com">Reddit.com</a>,
 <a href="/siteinfo/bing.com">Bing.com</a>,
 <a href="/siteinfo/wikipedia.org">Wikipedia.org</a>]
web_ranking[1].get_text()
'Google.com'
As expected, the top site in the U.S is no doubt, Google. To look at the complete list of the top ten sites,
import pandas as pd
website_list = [web_ranking_element.get_text() for web_ranking_element in web_ranking[1:]]

web_ranking_dict = {'Website': website_list}
df = pd.DataFrame(web_ranking_dict, columns=['Website'], index=range(1, len(website_list)+1))
df[0:10]
| Website | |
|---|---|
| 1 | Google.com |
| 2 | Youtube.com |
| 3 | Amazon.com |
| 4 | Yahoo.com |
| 5 | Facebook.com |
| 6 | Zoom.us |
| 7 | Reddit.com |
| 8 | Bing.com |
| 9 | Wikipedia.org |
| 10 | Myshopify.com |
import requests
from bs4 import BeautifulSoup

url = "https://www.billboard.com/charts/hot-100"

html_top100songs = requests.get(url).text
soup_top100songs = BeautifulSoup(html_top100songs, 'lxml')

titles = soup_top100songs.find_all('span', class_='chart-element__information__song text--truncate color--primary')

music_titles = [title.get_text() for title in titles]
# titles: list of "<span class="chart-element__information__song text--truncate color--primary">Butter</span>"
# title: "Butter" || title.get_text(): "Butter" || music_titles = a list of "title"
music_titles[0:10]
['Butter',
 'Good 4 U',
 'Kiss Me More',
 'Levitating',
 'Bad Habits',
 'Leave The Door Open',
 'Peaches',
 'Montero (Call Me By Your Name)',
 'Save Your Tears',
 'Deja Vu']
artists = soup_top100songs.find_all('span', class_='chart-element__information__artist text--truncate color--secondary')
artists_names = [name.get_text() for name in artists]
artists_names[0:10]
['BTS',
 'Olivia Rodrigo',
 'Doja Cat Featuring SZA',
 'Dua Lipa Featuring DaBaby',
 'Ed Sheeran',
 'Silk Sonic (Bruno Mars & Anderson .Paak)',
 'Justin Bieber Featuring Daniel Caesar & Giveon',
 'Lil Nas X',
 'The Weeknd & Ariana Grande',
 'Olivia Rodrigo']
song_ranking_dict = {'Song Title': music_titles, 'Artist Name': artists_names}
df = pd.DataFrame(song_ranking_dict, columns=['Song Title', 'Artist Name'], index=range(1, len(music_titles)+1))
df[0:10]
| Song Title | Artist Name | |
|---|---|---|
| 1 | Butter | BTS |
| 2 | Good 4 U | Olivia Rodrigo |
| 3 | Kiss Me More | Doja Cat Featuring SZA |
| 4 | Levitating | Dua Lipa Featuring DaBaby |
| 5 | Bad Habits | Ed Sheeran |
| 6 | Leave The Door Open | Silk Sonic (Bruno Mars & Anderson .Paak) |
| 7 | Peaches | Justin Bieber Featuring Daniel Caesar & Giveon |
| 8 | Montero (Call Me By Your Name) | Lil Nas X |
| 9 | Save Your Tears | The Weeknd & Ariana Grande |
| 10 | Deja Vu | Olivia Rodrigo |
Web API
API stands for “Application Programming Interface,” which means that it is one, an “interface,” and two, related to “application programming.” Application programming is an activity that produces programs applicable to some specific usage. An API is a special type of interface that allows for program-to-program communication. In essence, the function of an API can be compared to those of a delivery man, a waiter, or any kind of messenger whose job is to carry information between people.
There are two kinds of API–REST API and streaming API. In the case of a REST API, the client program sends a request to the server, which then closes the connection after a response. Similarly, for the streaming API, the client program sends a request to the server. But the server of a streaming API, unlike that of the REST API, continues to send back its response after refreshing the data. The server refreshes its data after a set of pre-determined events, and unless the connection is forcibly shut down, the server continues its own sequence of responses.
A response from the server, to be more specific, can either take the form of a JSON or a XML file. JSON (JavaScript Object Notation) and XML (Extensible Markup Language) are both markup languages, whose purposes are to provide structure and readability to files sent from the server to the client. However, files in XML, which was introduced before JSON, could get quite difficult to read once the format of the file became more complex. To improve readability, JSON was introduced in the early 2000s, and over the past two decades, the language has gained more popularity.
For this exercise, I used a popular online weather service called “OpenWeatherMap,” which supports a web API that accesses a large database full of weather-related data collected in various ways. To use their service though, I had to register for an account to receive a unique API key, which I then used to access their data via the requests() module.
base_url = "https://api.github.com/"
sub_dir = "events"
url = base_url + sub_dir
print(url)
https://api.github.com/events
import requests

base_url = "https://api.github.com/"
sub_dirs = ["events", "user", "emails"]

for sub_dir in sub_dirs:
    url_dir = base_url + sub_dir
    r = requests.get(url_dir)
    print(r.url)
https://api.github.com/events
https://api.github.com/user
https://api.github.com/emails
By the way, the above two code blocks could come in handy, should anyone attempt to access different levels of a website. For the below code block, I specified the parameters for the requests.get() function, using a dictionary type object. Even though there are various ways to access the OpenWeatherMap data via web API, including by specifying the city coordinates, zip code, and etc, I used the coordinates method, adhering to this format specified in OpenWeatherMap’s site: api.openweathermap.org/data/2.5/weather?lat={lat}&lon={lon}&appid={API key}. For the city coordinates, I used that of Seoul, South Korea.
import requests

LAT = "37.57"
LON = '126.98'
API_KEY = 'b73cd15e740682330142acf36998940d'
UNIT = 'metric'

req_url = "https://api.openweathermap.org/data/2.5/weather"
req_parameter = {"lat": LAT, "lon":LON, "appid":API_KEY, "units":UNIT}
r = requests.get(req_url, params=req_parameter)

print(r.url)
https://api.openweathermap.org/data/2.5/weather?lat=37.57&lon=126.98&appid=b73cd15e740682330142acf36998940d&units=metric
The following information was retrieved successfully from OpenWeatherMap’s database.
{"coord":{"lon":126.9778,"lat":37.5683},"weather":[{"id":500,"main":"Rain","description":"light rain","icon":"10n"}],"base":"stations","main":{"temp":23.85,"feels_like":24.46,"temp_min":22.23,"temp_max":24.78,"pressure":1005,"humidity":83},"visibility":10000,"wind":{"speed":3.09,"deg":280},"rain":{"1h":0.53},"clouds":{"all":75},"dt":1625749066,"sys":{"type":1,"id":8105,"country":"KR","sunrise":1625689070,"sunset":1625741760},"timezone":32400,"id":1835848,"name":"Seoul","cod":200}
{'coord': {'lon': 126.9778, 'lat': 37.5683},
 'weather': [{'id': 500,
   'main': 'Rain',
   'description': 'light rain',
   'icon': '10n'}],
 'base': 'stations',
 'main': {'temp': 23.85,
  'feels_like': 24.46,
  'temp_min': 22.23,
  'temp_max': 24.78,
  'pressure': 1005,
  'humidity': 83},
 'visibility': 10000,
 'wind': {'speed': 3.09, 'deg': 280},
 'rain': {'1h': 0.53},
 'clouds': {'all': 75},
 'dt': 1625749066,
 'sys': {'type': 1,
  'id': 8105,
  'country': 'KR',
  'sunrise': 1625689070,
  'sunset': 1625741760},
 'timezone': 32400,
 'id': 1835848,
 'name': 'Seoul',
 'cod': 200}
Conclusion
In this post, I went over several topics, including the basic background knowledge behind HTML, JSON, and XML. Even though this topic is by no means, a comprehensive review over the concerned materials, I hope you found this post helpful in gaining an introductory insight into gathering and extracting data from the web.